
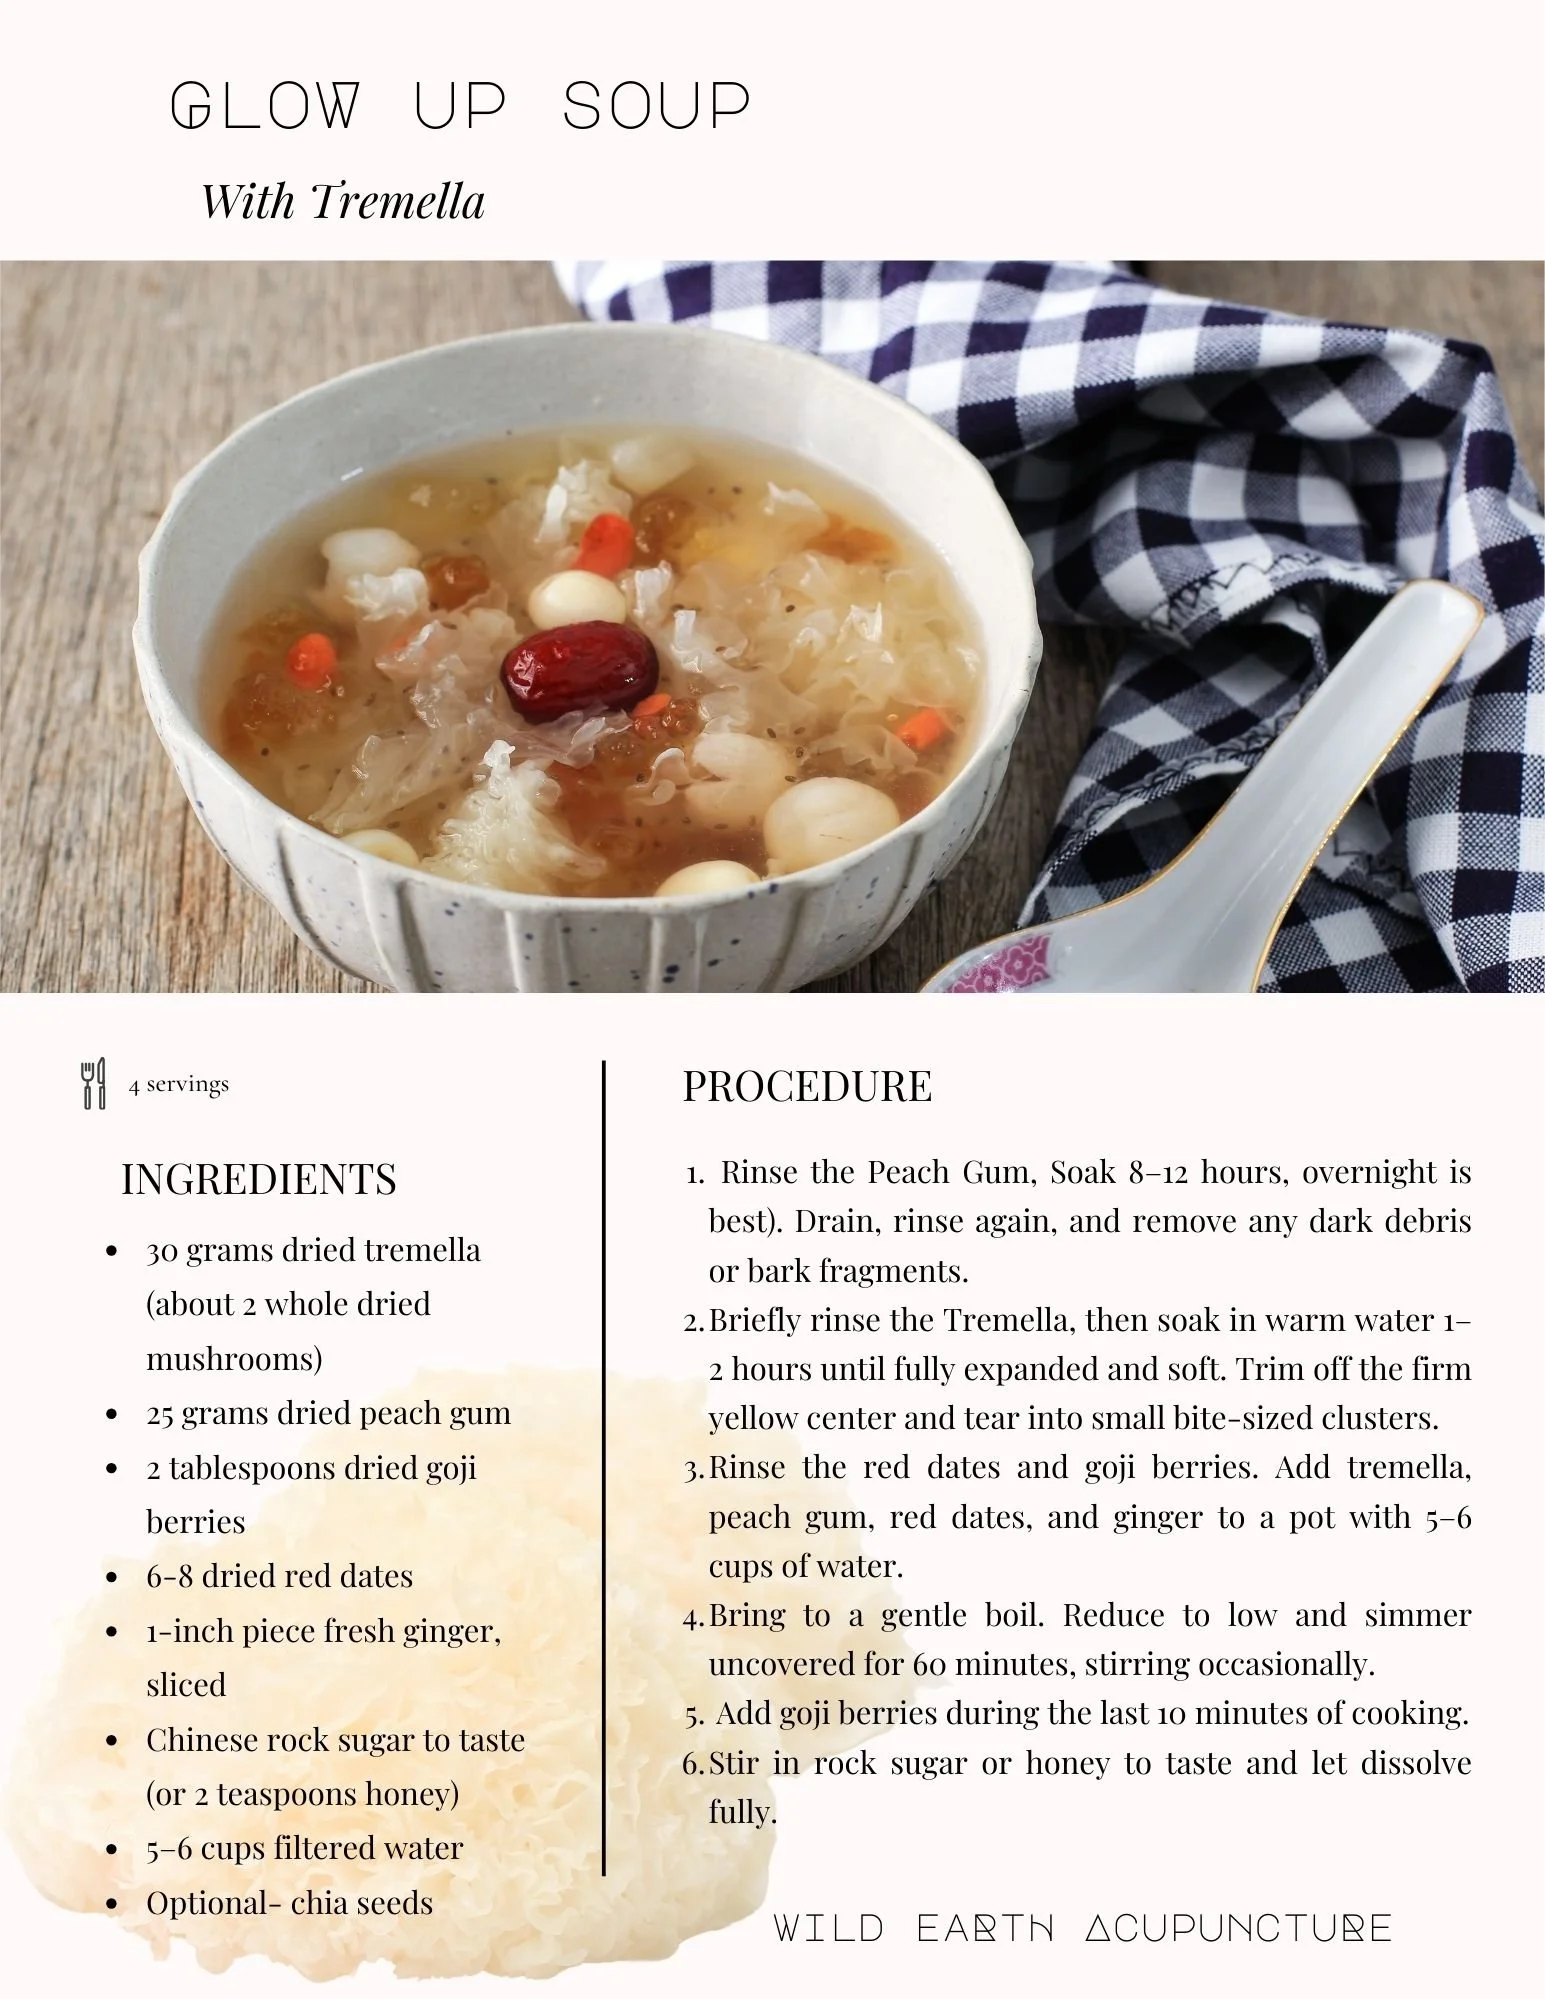
How to Make Ghee–Clarified Butter
In the world of culinary traditions, few ingredients boast the rich history and revered status of ghee. Often described as liquid gold, ghee is more than just clarified butter; it's a cornerstone of Indian cooking, cherished for its unique flavor, nutritional benefits, and versatility. Making ghee at home is a rewarding process that connects you to ancient practices while allowing you to create a high-quality, aromatic butterfat that enhances any dish. Whether you're a seasoned chef or a curious foodie, mastering the art of making ghee will not only enrich your culinary repertoire but also offer a taste of tradition that’s been savored for centuries. In this guide, we'll walk you through the simple steps to craft your own batch of ghee.

Ghee, also known as Clarified Butter, is a delicious food that is best made from organic unsalted butter. The butter is slow cooked to remove the water and milk solids and is a staple in Ayurvedic medicine, a natural medicine philosophy of India. Ghee is a wonderful substitute for many cooking oils, as its smoke point is 485 degrees, (much higher than other oils) which makes it a great choice for high temperature cooking. Oils are very sensitive and can break down into free radicals if cooked above its smoke point, or even left open to oxidize. Ghee also tends not to be a problem with people who are sensitive to milk, as only trace amounts of lactose and casein remain after cooking the butter.
Benefits of Ghee
Does not need to be refrigerated
Safe for people with milk sensitivities
Enhances digestive fire
Anti-inflammatory
Enhances the complexion
Increases physical/ mental stamina
Increases immunity, vitality, and longevity
Nourishes and cleanses the blood
Slight alkalizing effect
How to Make Ghee
INGREDIENTS
1 lb. unsalted organic butter
EQUIPMENT
Medium Saucepan
Cheesecloth or tea strainer
Clean jar for storage
PROCEDURE
Cube the butter and place it in your saucepan.
Heat the butter over medium-low heat until completely melted. Reduce to a simmer.
Cook for about 10-15 minutes. (This time will vary depending upon your stove.) Watch the butter carefully as during this time, the butter will go through a few different stages, and form distinct three layers. The milk solids with sink to the bottom, the top will foam, and the clarified butter will be in between. At this point, the melted butter should be a beautiful bright gold and there should be reddish-brown pieces of milk solids at the bottom of the pan. I like to wait till the milk solids, which will sink to the bottom of the pan are a toasted brown color, as it adds to the fullness of flavor.
Let cool slightly for 2-3 minutes and then slowly pour through the wire mesh strainer lined with several layers of cheesecloth. Make sure to discharge the small golden brown pieces of milk protein.
Traditionally ghee does not need to be refrigerated, so store it in a cool dry place, or keep in the fridge for safekeeping.
A variety of species can be cooked into the butter, and strained out at the end, for a delicious flavored butter! I have experimented with cantrelles, garlic, and a variety of other herbs.
Just know that Ghee is much more flavorful than butter, so you don't need to use as much.


The 5-Minute Spleen-Boosting Snack: Honey Toasted Walnuts